 This time, the theme is to create a card or project based on a favorite technique.
 There are sooooo many techniques that I love but with this project, I'm going to focus mainly on two. Can you guess what one of them is? Yup, you guessed it...masking!
There're so many things you can do with this technique from: simple masking to creating seamless backgrounds and adding depth...hmmm, I think I've decided to do a blog series focusing on the different things you can do with masking.
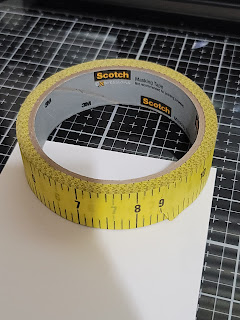
For this post, I chose to start with a simple spotlight masking technique. Let me show you how I created this card. Now I incorporated several other techniques (dry embossing and double heat embossing), but the focus today is masking.Using the masking tape (Tip: make sure to de-"stickify") the tape so it doesn't rip your cardstock when you remove it), I added one strip to the "bottom" approximately 1/2" from the bottom and then another strip on the top to create a space between the 2 strips about 2" wide. (Note: you can make this as narrow or as wide as you like) Once I was done with that, I chose my ink colors: Stampin' Up!'s Blushing Bride, Rococo Rose and Merry Merlot (I wanted the hues to stay kinda sorta in the same color family. I think I'll do another that says more Autumn/Fall) and applied color using the blending brushes starting with the lightest shade and ending with the darkest. I added the Blushing Bride from top to bottom, the Rococo Rose from the bottom to midway and then the Merry Merlot mostly to the bottom of the space. Once I did that, I carefully removed the masking tape and this was the result...AaaahMAZaaaING!!!!!
 Whew, not that that's done, I stamped the main image from the Beauty of Tomorrow set in Versafine Nocturne and then the sentiment from the Best Year set in Merry Merlot. Here's where the second technique comes in double heat embossing. I got this from Jennifer McGuire and I haven't looked back. Double heat embossing adds extra depth and texture to whatever you are applying the technique to. I mainly add it to my sentiments so that they stand out more and I heat emboss at least three times...that's me...a little extra. 😉
You can see the Stampin' Up! products I used to make it.
Product List


What a great technique to show off! Love your shading!
ReplyDeleteTHanks, Libby! Definitely one of my Go To techniques...the simple masking
DeleteBeautiful card, love it x
ReplyDeleteThanks, Karen! I had a blast making it!
Delete