Daffodil Day Dream -

Hello, Stampers!

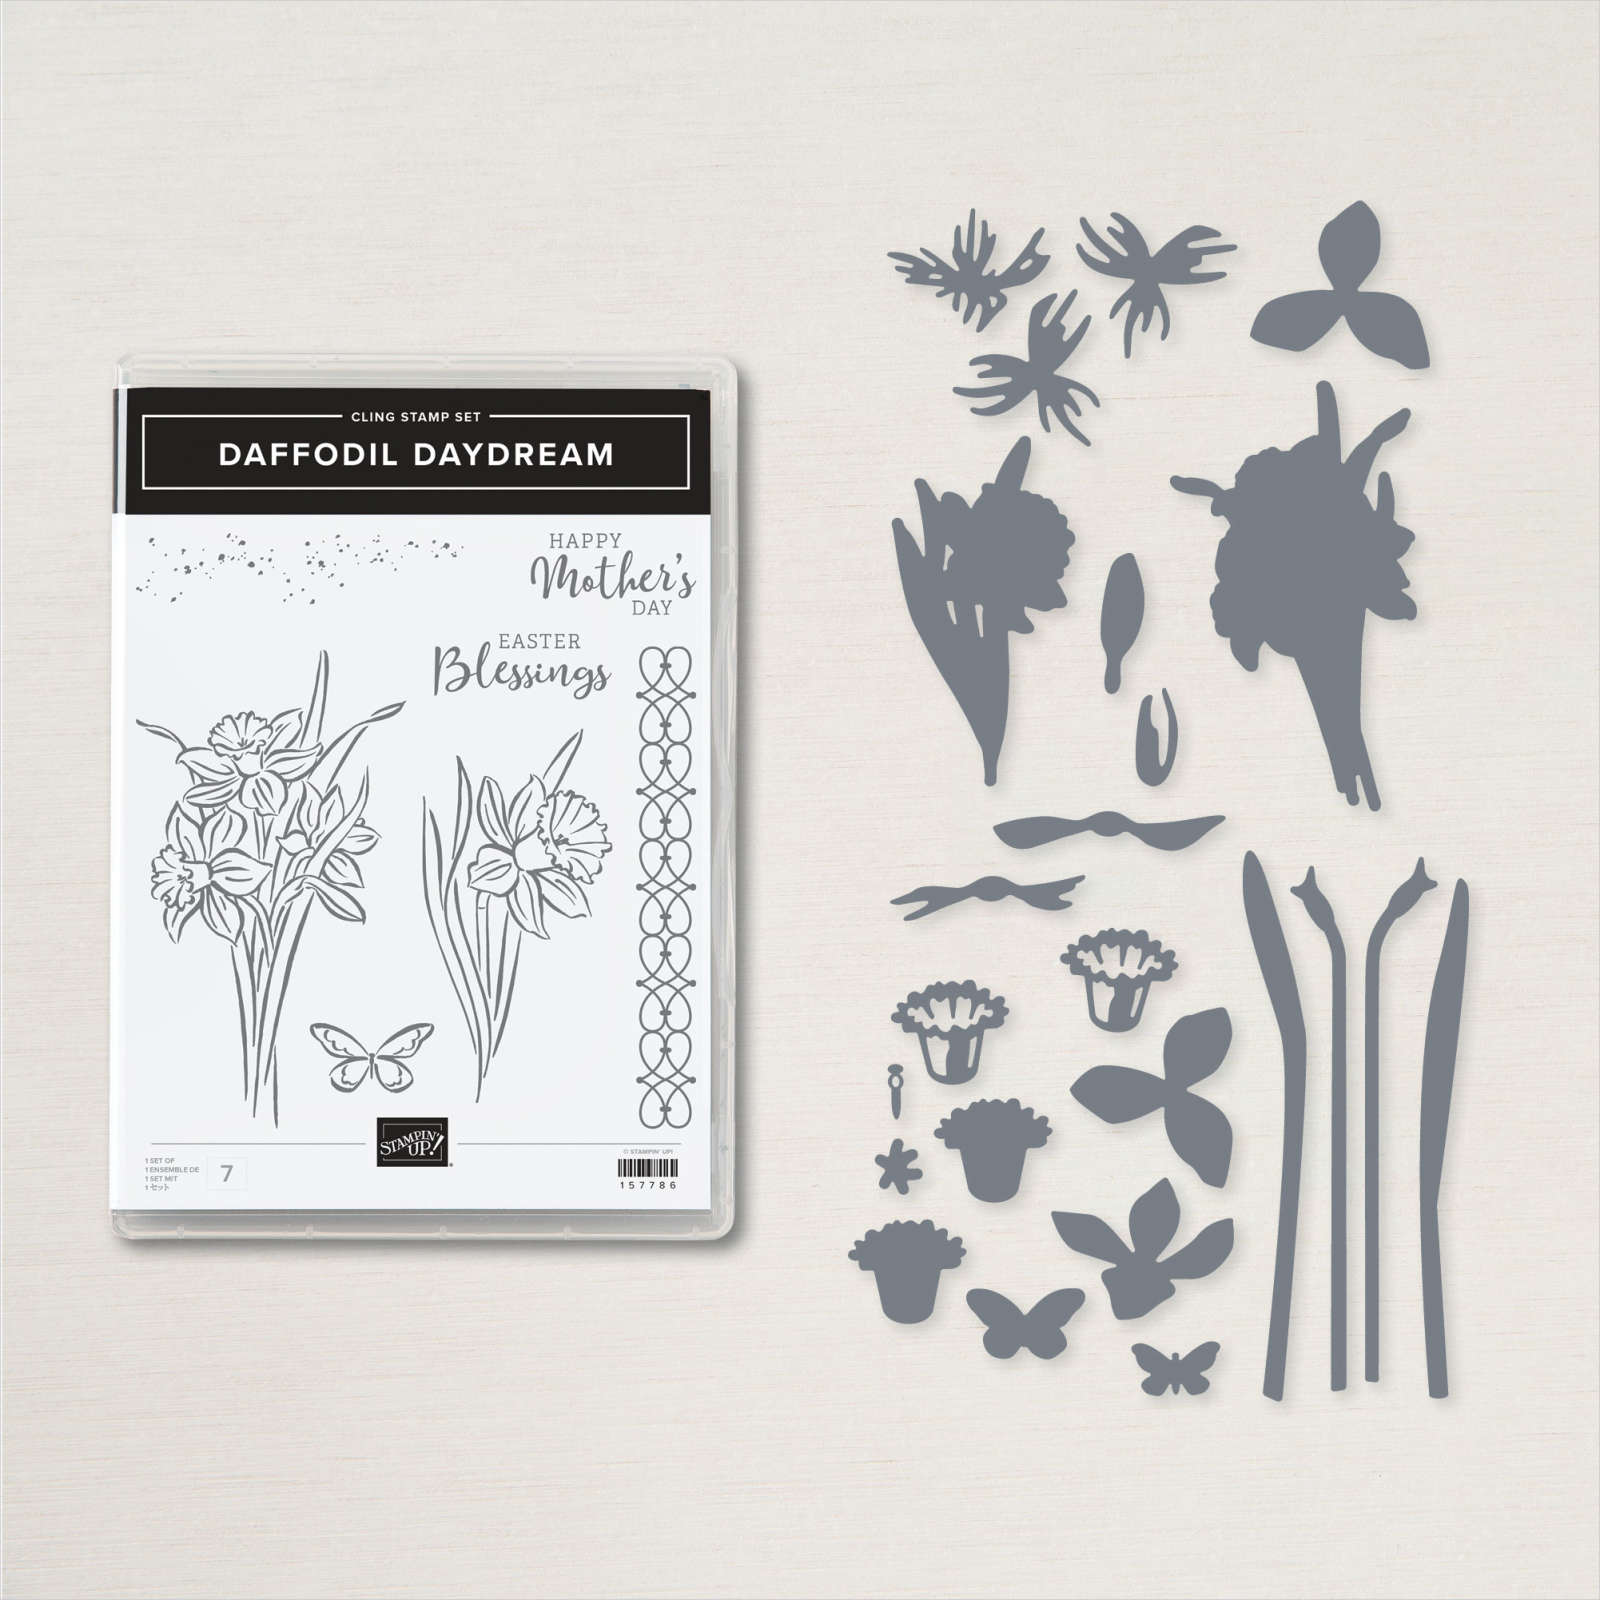
Thanks for stopping by today to see what I have in store for you!  I'm going to have fun with the Daffodil Daydream bundle from the newly released Stampin' Up! January- June 2022 Mini Catalog.  Pefect for sooo many occasions.

In this project today, we are featuring the masking, tone-on-tone stamping to create your own background, multiple heat embossing, and ink blending techniques...all of which I tend to use regularly in my cardmaking.  

This card project used minimal supplies as you can see and was very easy to create.  


1. Before you start stamping, cut the following paper pieces:

• 8-1/2" x 5-1/2" Pale Papaya Cardstock
• 3-1/2" x 5" Pale Papaya Cardstock
• 2-1/2" x 4" Basic White Cardstock
• 2" x 3/4" Basic White Cardstock


2. On the center of the 2-1/2" x 4" Basic White piece, stamp the single daffodil image from the Daffodil Daydream Stamp Set in Vesafine Claire ink. Repeat this step, stamping onto a sticky note. This will be the mask you use to try the masking  technique!


3. From the Daffodil Dies, pick the die that coordinates with the single daffodil image. Align the die with the daffodil stamped on the sticky note and run it through a Stampin’ Cut & Emboss Machine to cut. (Either of our machines will work.) You can also fussy cut the image with snips.


4. Stick the die-cut daffodil on top of the daffodil stamped on Basic White Cardstock. Using a Blending Brush, gently apply Pineapple Punch ink in a circular motion over and around the daffodil. Next, pick up some color with the Wink of Stella pen to color in the floral image.  I chose to highlight the main daffodil flower. When done, remove the sticky note from the daffodil.


5. With Vesafine Claire ink, stamp the set’s "Easter Blessings" sentiment onto the 2" x 3/4" Basic White piece. Add the clear embossing powder and heat emboss using the heat tool.

Create the card base by folding the 8-1/2" x 5-1/2" piece in half and scoring at 4-1/4", then use foam adhesive sheet to adhere the 3-1/2" x 5" piece to the center of the card base. Adhere the remaining pieces to the card front, then embellish with a few Brushed Brass Butterflies!

Check out the YouTube video to see how I made this card.


Product List

Pineapple Punch Classic Stampin' Pad
[147141]

Comments

  1. Beautiful card and sample! Thanks for sharing.

    ReplyDelete
  2. Love the colors and how you highlighted the flower. Great job!

    ReplyDelete

Post a Comment

Popular posts from this blog

Countryside Shapes - A Stamping With Friends Blog Hop

  Hello everyone, and welcome back! It's the third Saturday of the month...time for another Blog Hop!  Thank you for joining us for another Stamping with Friends Blog Hop!  If you are new to my blog, Stamping with Friends is a group of Stampin' Up!® demonstrators worldwide who share our love of card-making through monthly blog hops with various themes. If you are following the hop, you'll have just popped over  from  Mickey Moore - "2 Moore Stampers's " blog .  I hope you took a minute to leave a comment for her as I'm sure she'll appreciate it as much as I will. If you are starting the hop with me, thank you so much and I hope you enjoy what I and the other hoppers have prepared for you today! Our theme this month is all about shapes...circles, squares, rectangles, animal shapes...whatever that means to you.  I chose to use a hexagon shape for my quick and easy project.  I hope you enjoy this card and that you will try to make one or two for your...

In The Moment January - June 2022 Mini Catalog Sneak Peak

Hello, all! Thank you for joining me for another Stamping with Friends Blog Hop! For those of you who are unfamiliar, Stamping with Friends is a group of Stampin' Up! demonstrators who share our love of card making with you through monthly blog hops with various themes.  This month, we are sharing with you sneak peeks from the January - June 2022 Mini Catalog.  If you've come from  Mo Rootes'  blog, then you saw her project using the  Stampin' Up! Simply Marbleous Designer Series Paper (DSP) . I hope these and the other projects serve to inspire your creativity.   Speaking of catalogs, if you don't have a Stampin' Up! demonstrator and would like a catalog, reach out to me. I'd love to get one out to you and to serve as your demonstrator. For my contribution to this blog hop, I chose the "In the Moment" set. I fell in love with this set, "In The Moment", the moment I opened my order and saw it.  This was another of the FREE swag bag produc...

Hello Fall Y'all! - Pretty Pumpkins

  Welcome and Happy Fall Y'all! Thanks for stopping by Sweets' Stampin' Creations, where I share card  projects created using Stampin' Up! products.  It's time for another Stamping With Friends blog hop!  I'm hopping with some awesome paper crafters and stampers from the Stamping With Friends Facebook Group.  For this post, it's all about Fall. I love this time of year...although I live in Texas and don't get to experience the changing of the seasons as dramatically as my college years when I lived in Worcester, MA...I still remember the colors of the season and the changing of temperatures from hot to cool (not cold).    Fall, the time of the year between Summer and Winter (usually between September and December) heralds in pumpkin season (pumpkin spice, pumpkin pie...you get the drift), soup season, leaves changing colors, cooler weather, apple picking (I've never done that), etc. T here are so many ways to celebrate this season of the year.  ...